Installation
The installation process for FingerBot is simple and straightforward and is compatible with Windows 11 and macOS (Intel & Arm). The latest version of FingerBot can be found in the #fingerbot-updates channel on Discord.
Downloading
The first step is to download the latest FingerBot version. It’s downloaded as a .zip file which must be first be extracted before use. You can place it anywhere you’d like on your machine and it will work correctly. I personally recommend either the Desktop or Documents folders but any location is fine.
FingerBot Application Setup
🪟 Windows Setup
- Make sure to extract the
.zipas instructed below:- Press the Extract All… option to properly unzip the folder.
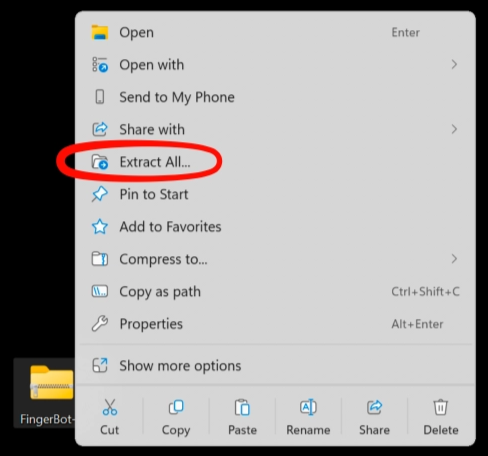
Windows unzip process - Open the
FingerBot.exefile.- OPTIONAL: Pin FingerBot to start for easy access. Right click on the FingerBot file and click “Show more options” → “Pin to start”
- Run FingerBot by either double clicking the FingerBot file or clicking the pinned shortcut (created in the previous step)!
🍎 macOS Setup
- Start by unzipping the downloaded file by double clicking the
.zipfile - Drag the entire folder to your desired save location (The entire folder - not just the program file)
- Run FingerBot (right click and press “Open” if you are experiencing issues)
- You will likely have to allow the FingerBot application to run on your system if prompted on the first startup (go to System Settings → Privacy & Security → Click “Allow FingerBot”. FingerBot requires permission to open and take control of Chrome during drops. This is a one time process and will only happen on the first run.
File Structure
macOS:
text FingerBot/ ├── FingerBot.app # macOS app bundle └── finger_extension/ # Chrome extension (load this in Chrome)
Windows:
text main.dist/ ├── FingerBot.exe # Main app — double-click to run └── finger_extension/ # Chrome extension (load this in Chrome)
All saved data is stored and managed by FingerBot and is rarely needed to be accessed but if required can be found here:
Windows: %LOCALAPPDATA%\FingerBot\
macOS: ~/Library/Application Support/FingerBot/).
Installing the FingerBot Extension
FingerBot utilizes a custom made Chrome extension to automate many processes via the browser. The installation process is outlined below.
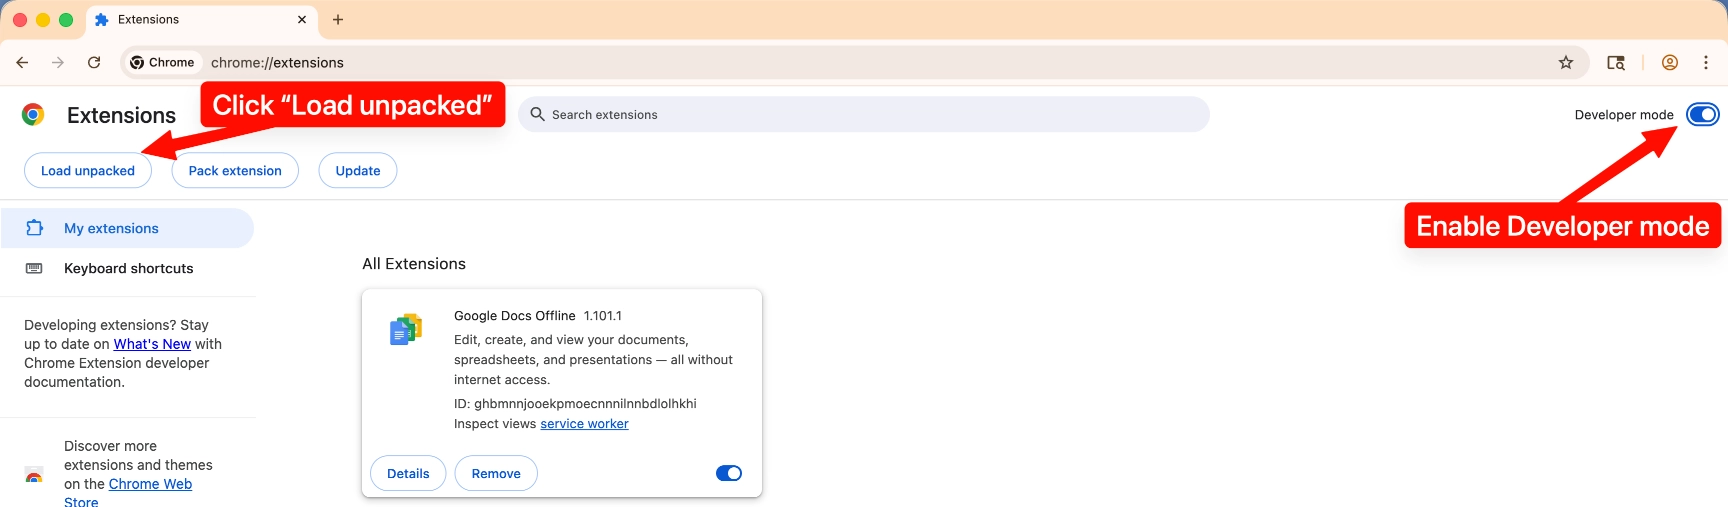
Steps
-
Open Google Chrome and go to the extensions page (
chrome://extensions). You should setup the extension on the browser profile you intend to use during drops. -
Enable “Developer mode” by clicking the toggle on the upper right corner of the page.
-
Add the
finger_extensionto Chrome- Click the “Load unpacked” button and navigate to the “finger_extension” folder and “Select” it
- Drag the
finger_extensionfolder into the the extension list
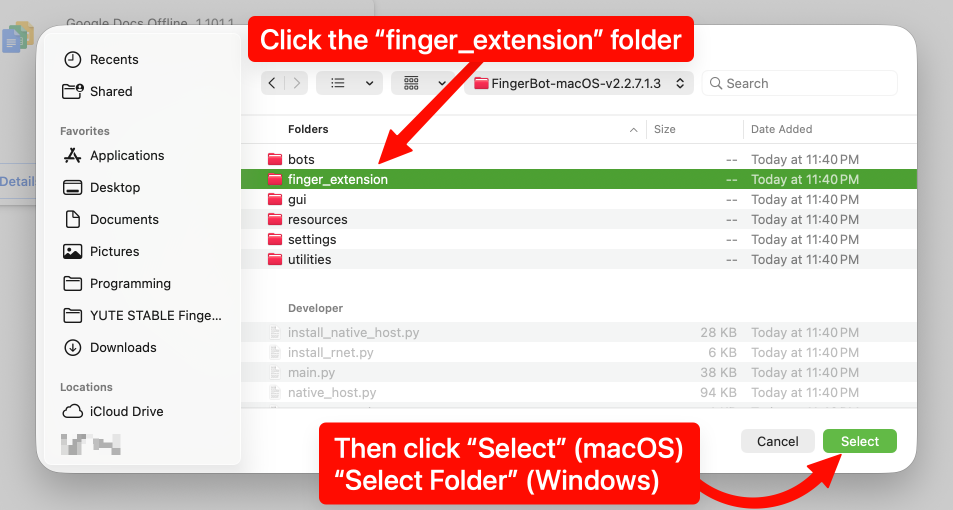
3a. Loading finger_extensioninto Chrome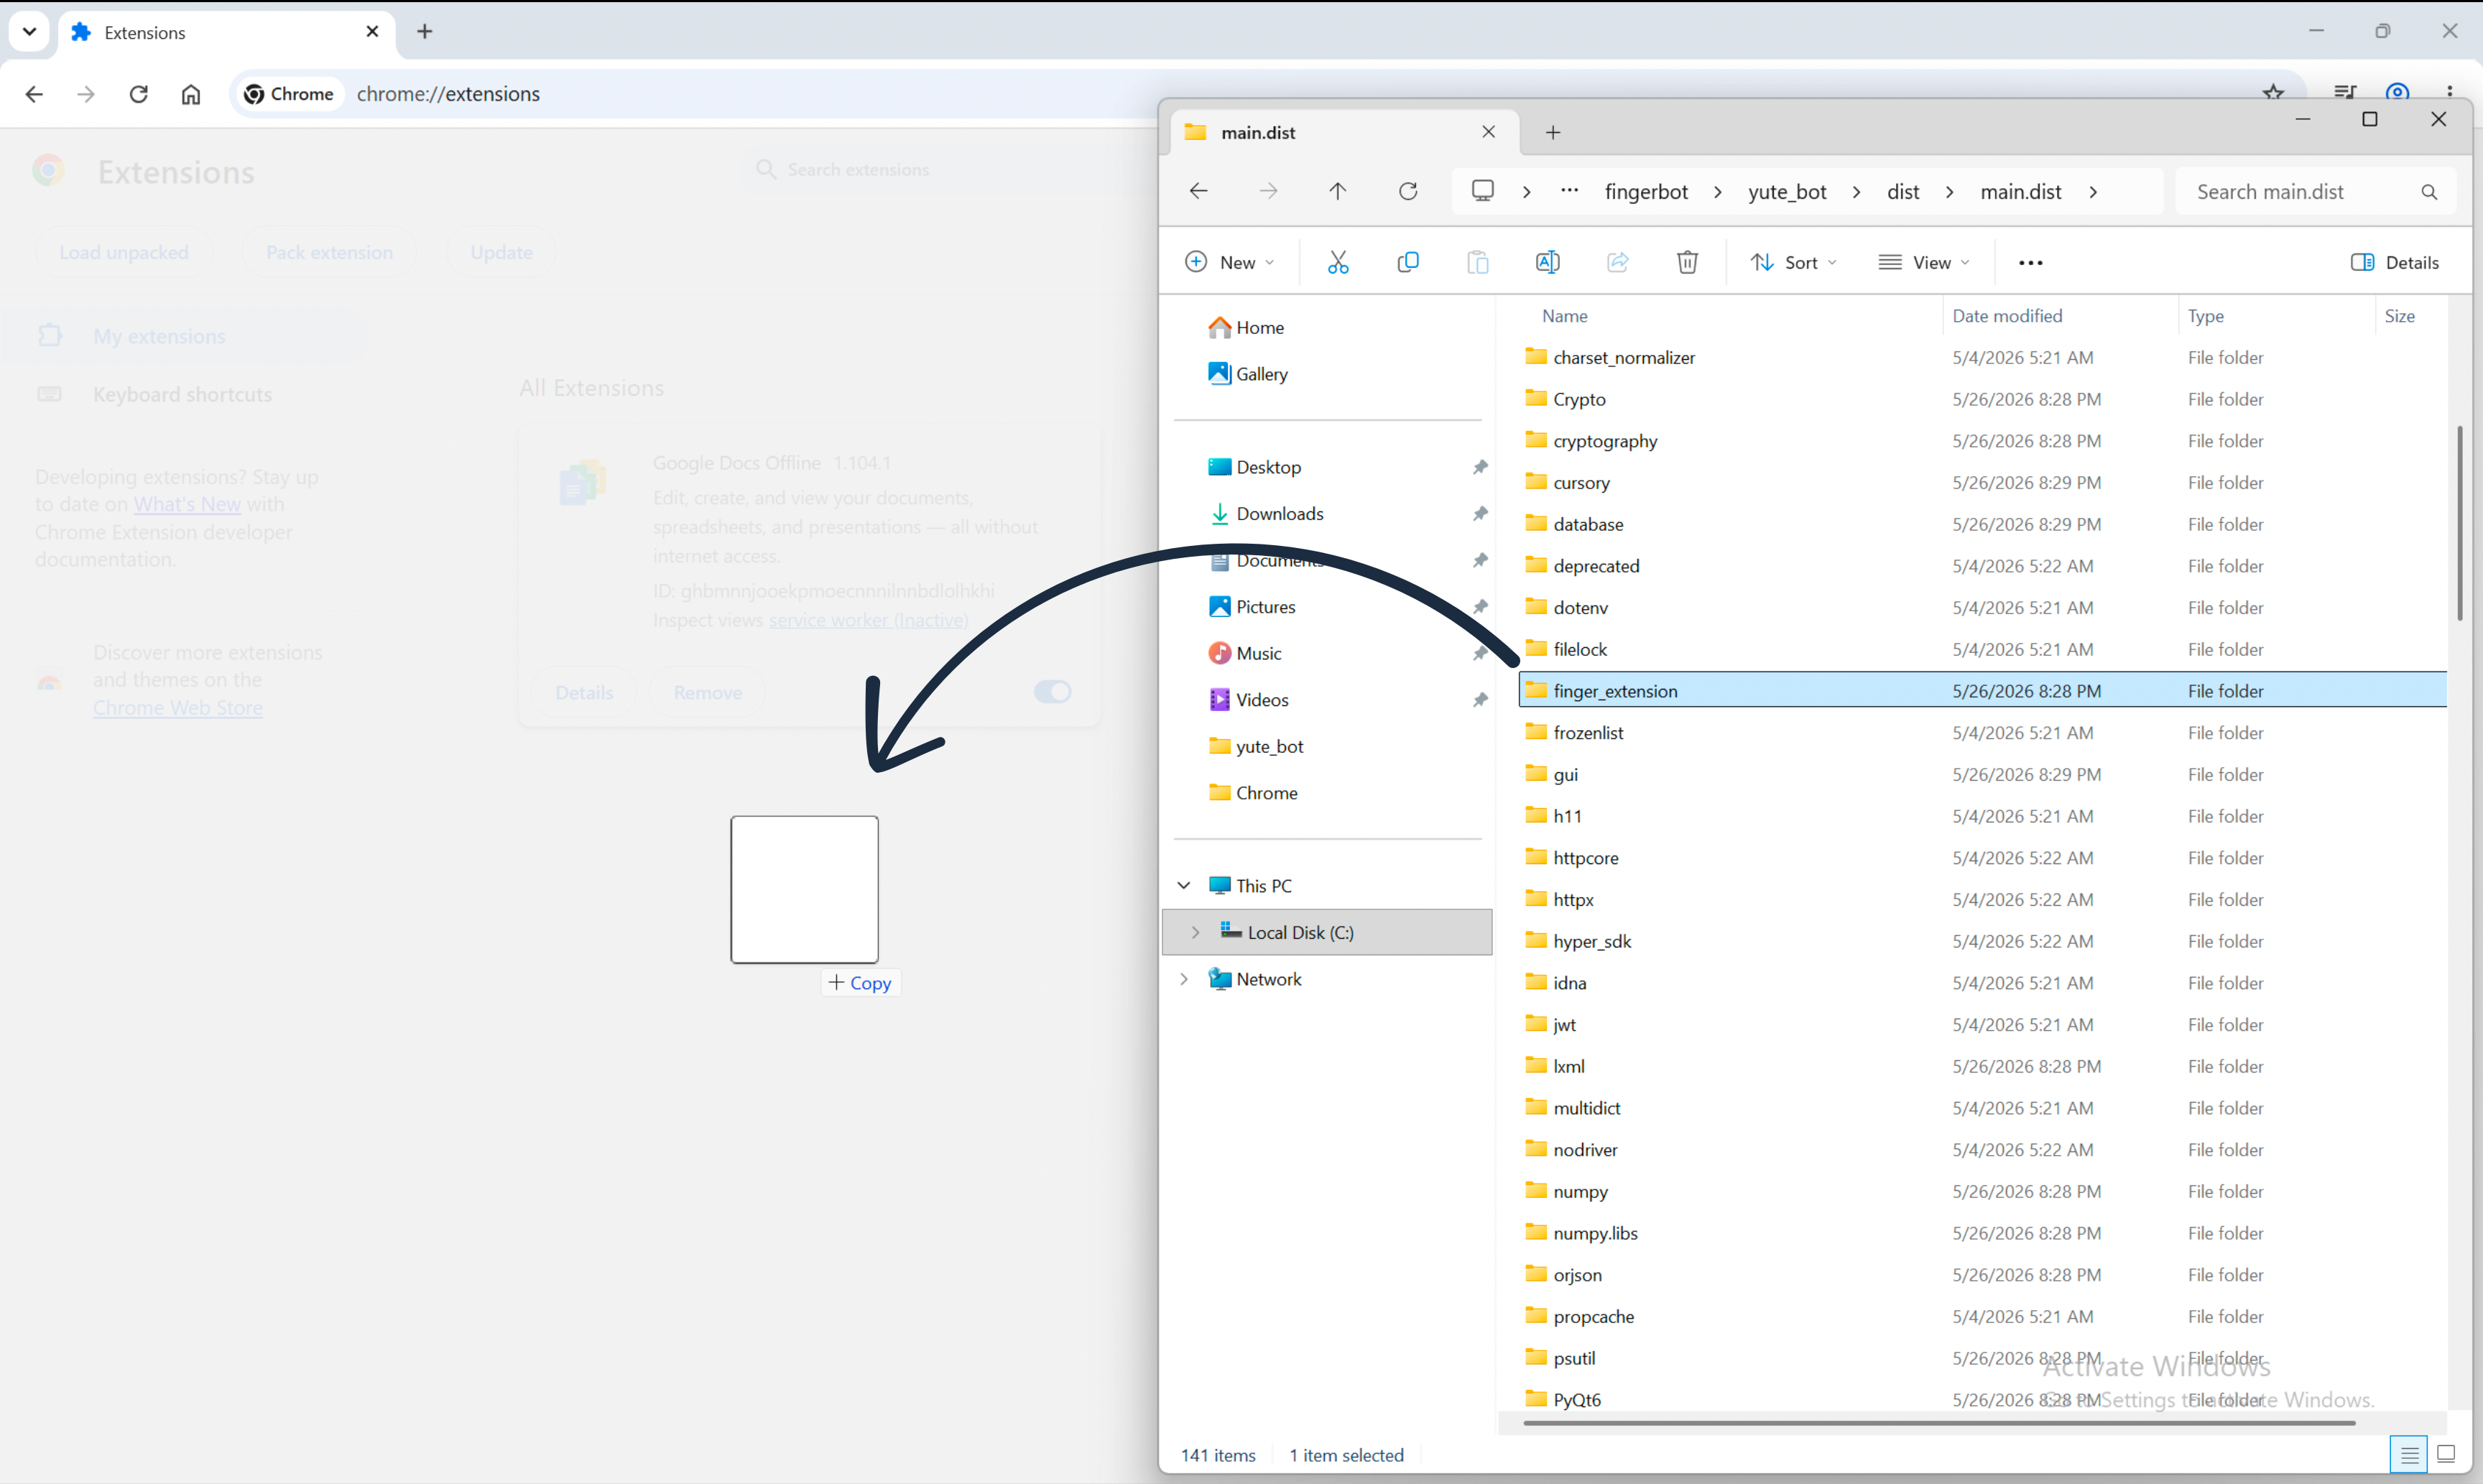
3b. Dragging finger_extensioninto Chrome -
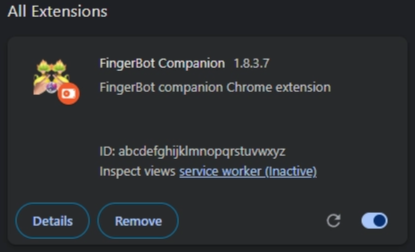
Copy your unique FingerBot extension ID value (will be used in the next step)
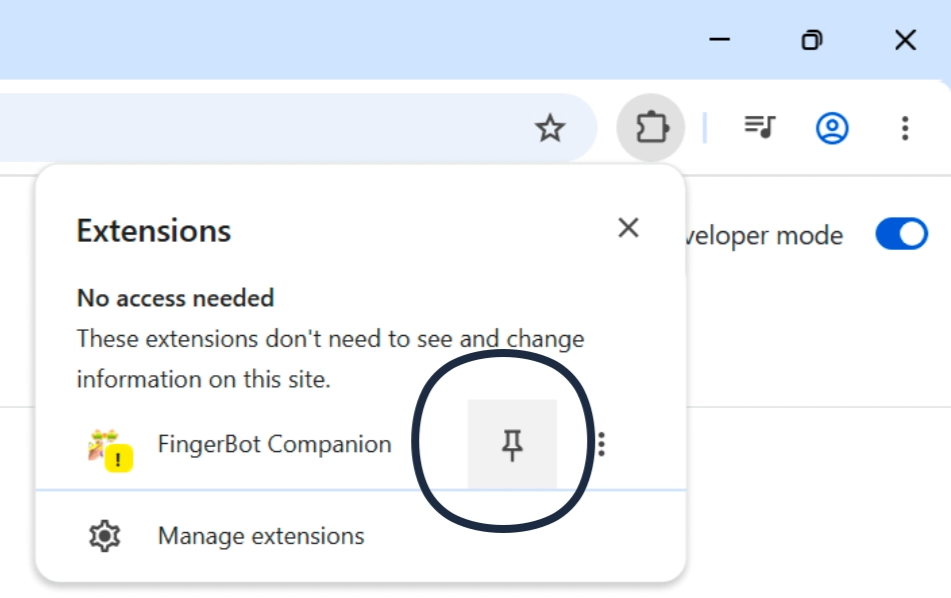
- (OPTIONAL BUT RECOMMENDED) Pin the extension to your toolbar by pressing “Details” button, you’ll find an toggle to “Pin to toolbar”
Connecting the Extension
-
Open the FingerBot Settings window, at the bottom of the General tab is a spot to enter the extension’s ID (the one you just copied in the previous step!).
-
Press connect:
- If it succeeds, restart Chrome and it should be properly connected the next time you open Chrome (assuming that the FingerBot application is open).
- If it fails, check to make sure that the extension is properly added to Google Chrome or you pasted the correct information in settings.
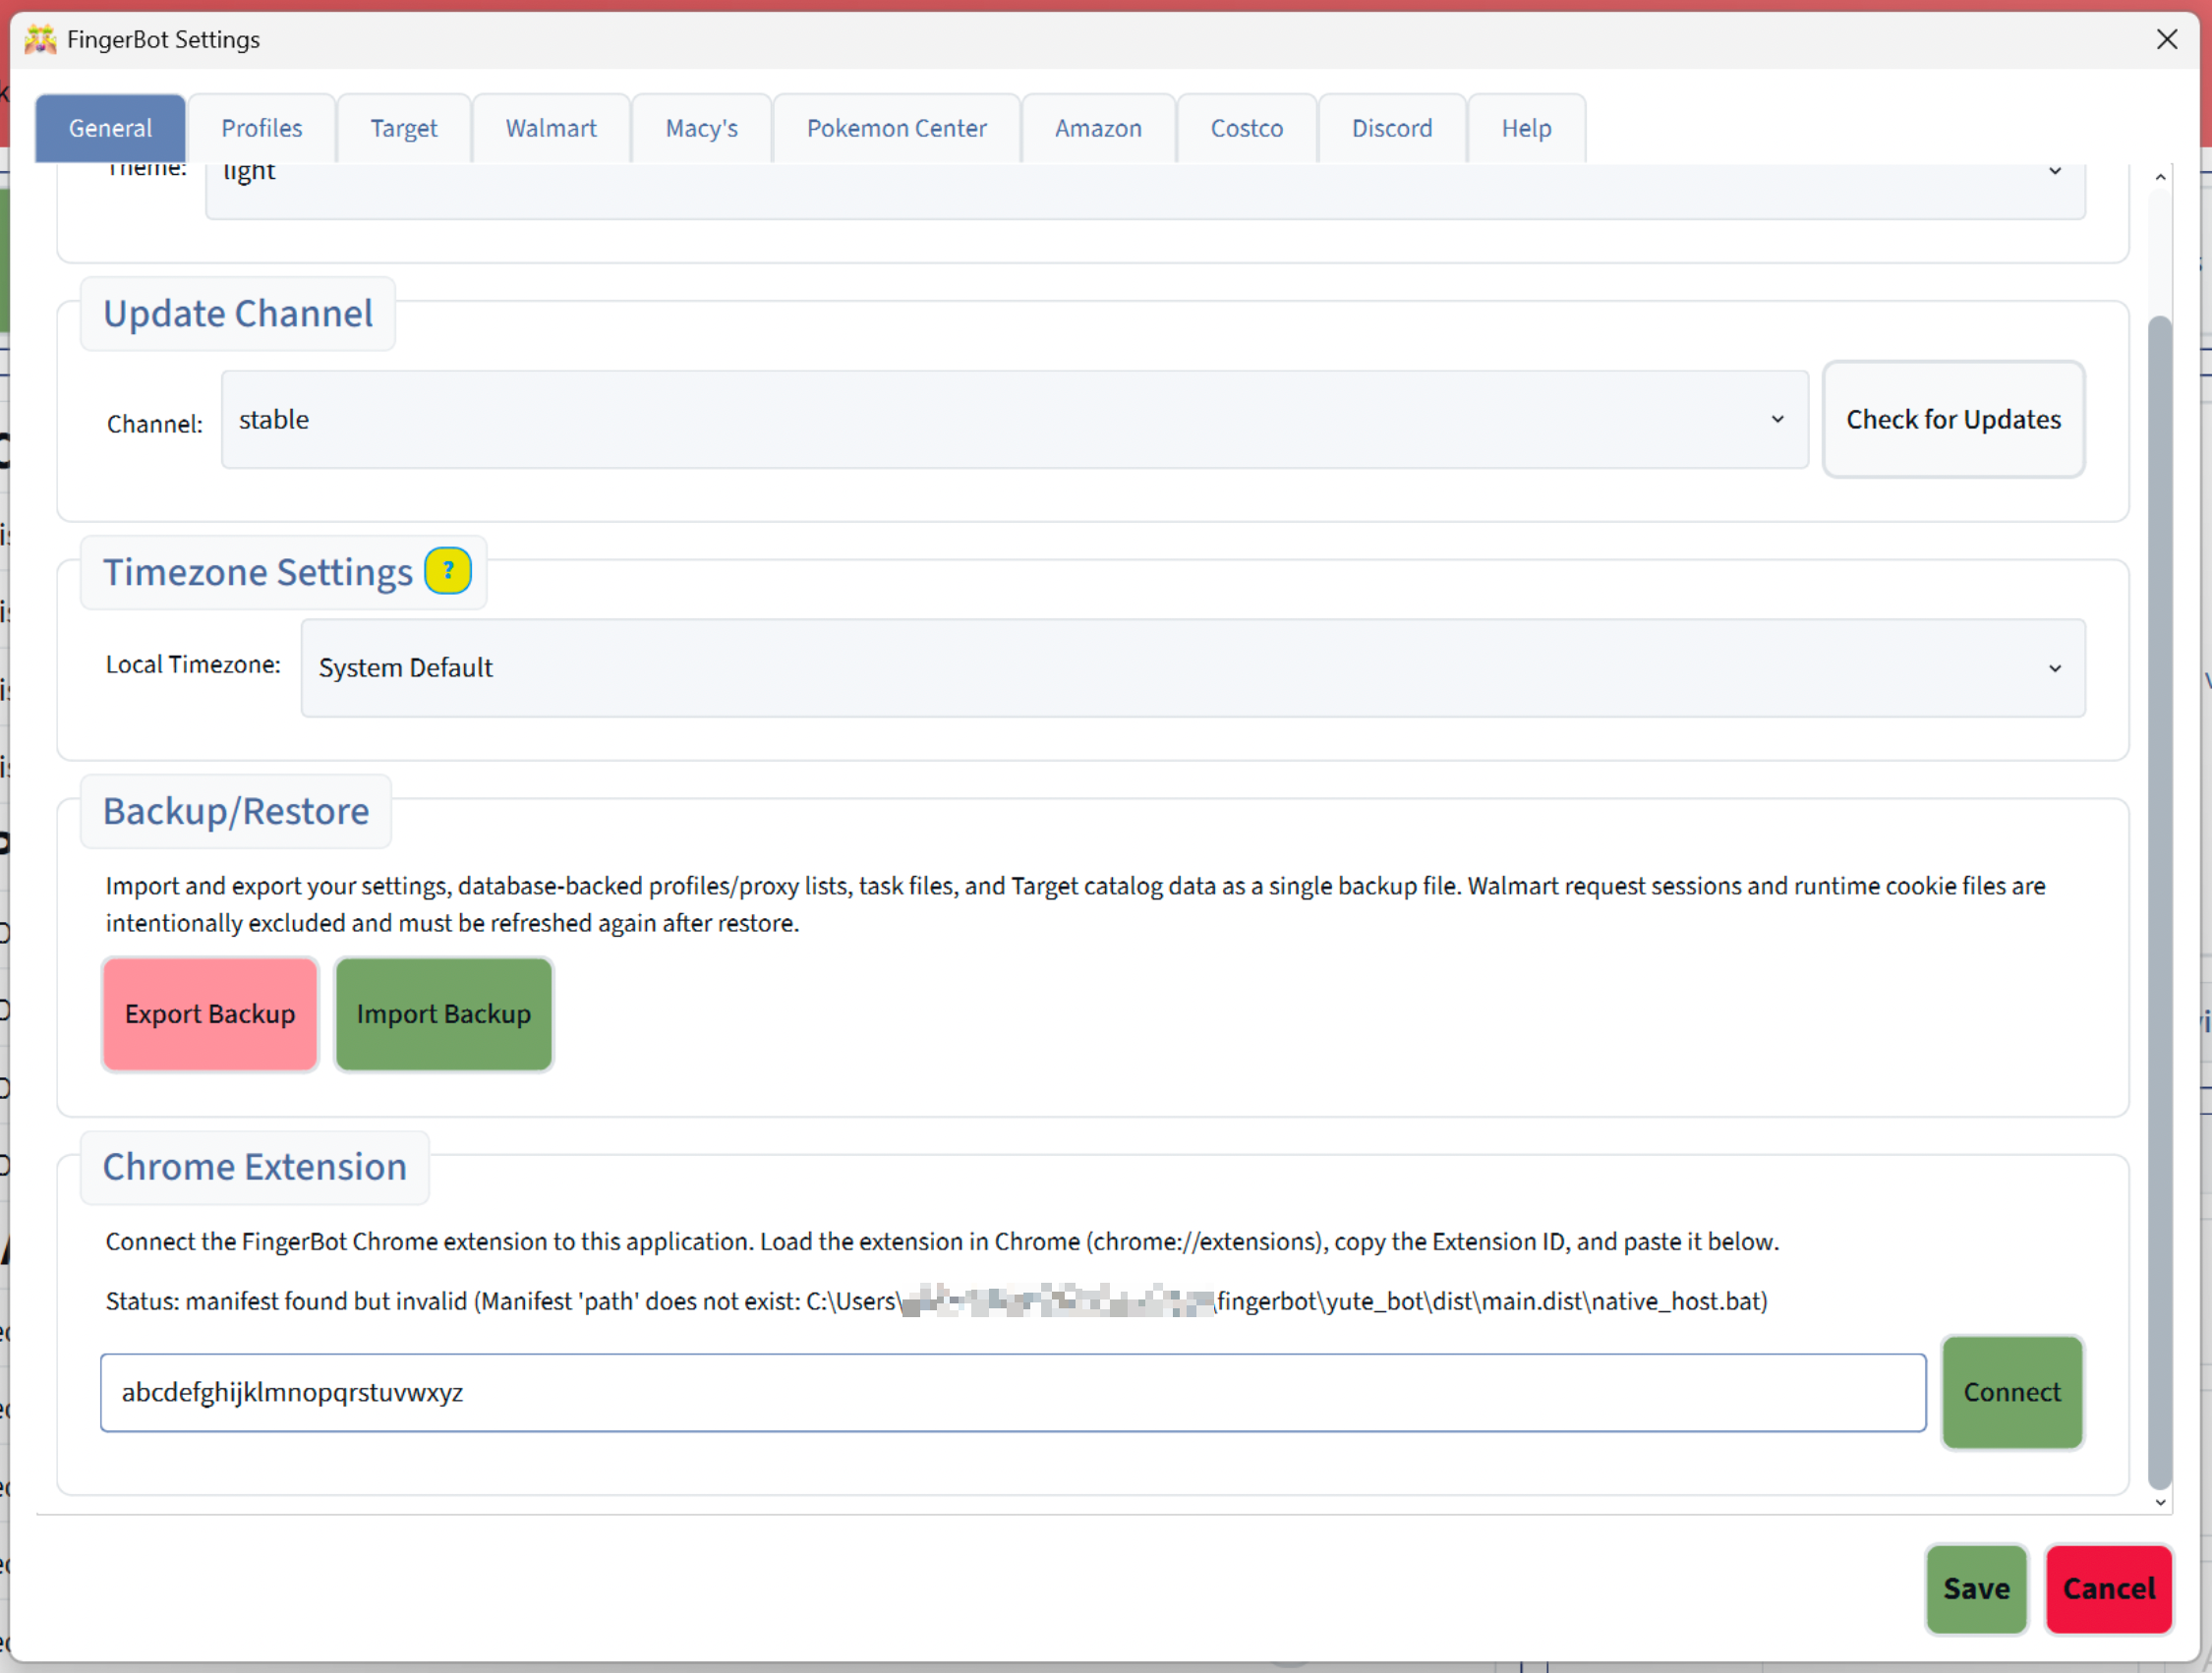
Add extension ID in settings 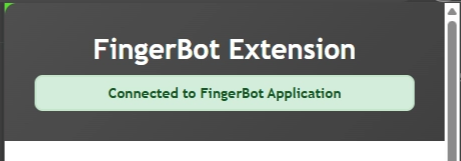
Successful finger_extensioninstallCongratulations: you have successfully installed FingerBot! 🎉
Extension Troubleshooting
- macOS users: If you struggle to find the
finger_extensionfolder, you may have to right-click the FingerBot.app file and press “Show Package Contents”. You will then find thefinger_extensionfolder by traversing through the folders as such: Contents → Frameworks → finger_extension